 |
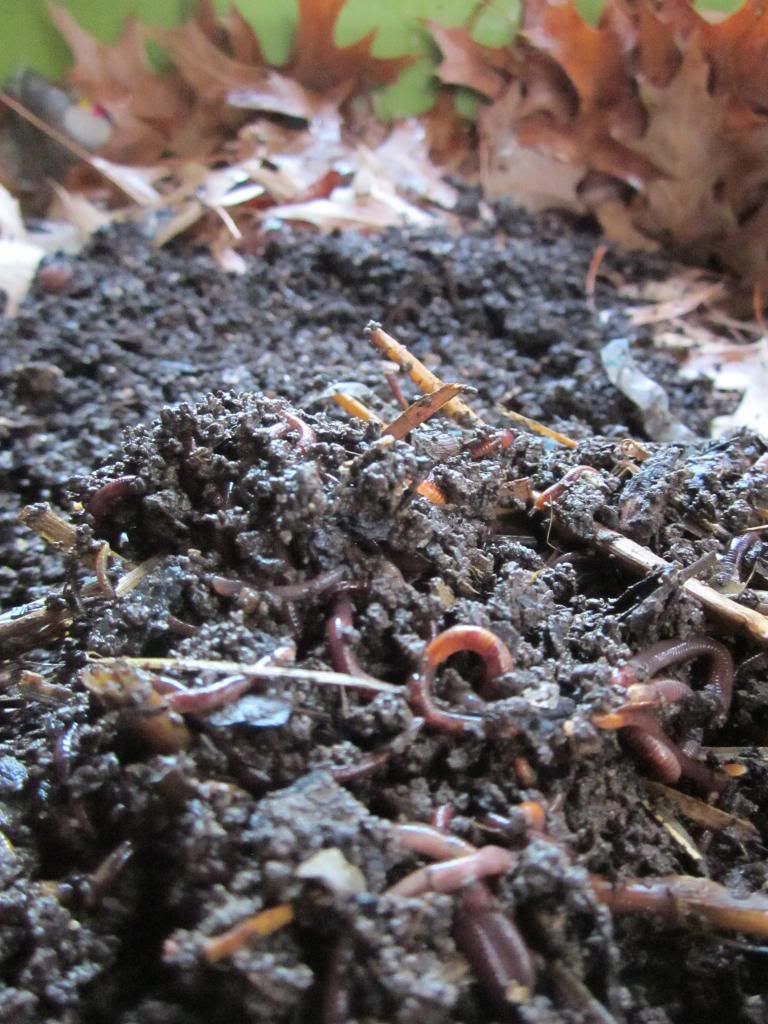
| Red wiggler worms are best suited for life in a vermicompost bin |
Benefits of vermicomposting
- It's a simple, relatively clean way to recycle some food waste.
- Provides a good supply of fat, healthy worms for fishing.
- The end product, rich, dark, vermicompost, is a great soil amendment.
- You can also make worm tea during this process, which is high in nutrients and deters some pests.
- Worms, vermicompost, and worm tea can be sold for $$$.
- Worm compost bins can be used in a classroom setting to teach about decomposers, communities, recycling, and other key concepts.
Considering all these benefits, the cost of building the worm bin is very low.
To create your own vermicompost bin, you'll need
To create your own vermicompost bin, you'll need
- 2 Roughneck Rubbermaid bins and lids, 10 gal $7.27 ea. Home Depot
- You can choose the size bin that's right for you. I prefer 10 gal for my apartment.
- Virtually any type of plastic storage bin will work for this project. In my experience, Roughneck's hold up best against UV damage and don't crack or shatter.
- Additional bins can be added as the worm population grows.
- Used potting soil (continuing in the recycling theme), finished non-worm compost, or potting soil without fertilizer prills
- 2 pieces of cardboard
- Newspaper or other shredded paper
- Autumn leaves (optional if not available but beneficial)
- 4 small pieces of scrap wood
- Red wiggler worms, available from most bait shops or an established worm compost bin
- Red wigglers are excellent composting worms that will thrive in your bin.
- Nightcrawlers don't thrive in confinement and will find a way to escape. They're also not great for composting.
- Worms hand-dug from the garden probably won't be suited for life in a compost bin either.
Some other tools that may be helpful:
- a power drill
- 1/4-inch drill bit
- 1/16-inch drill bit
Building the vermicompost bin
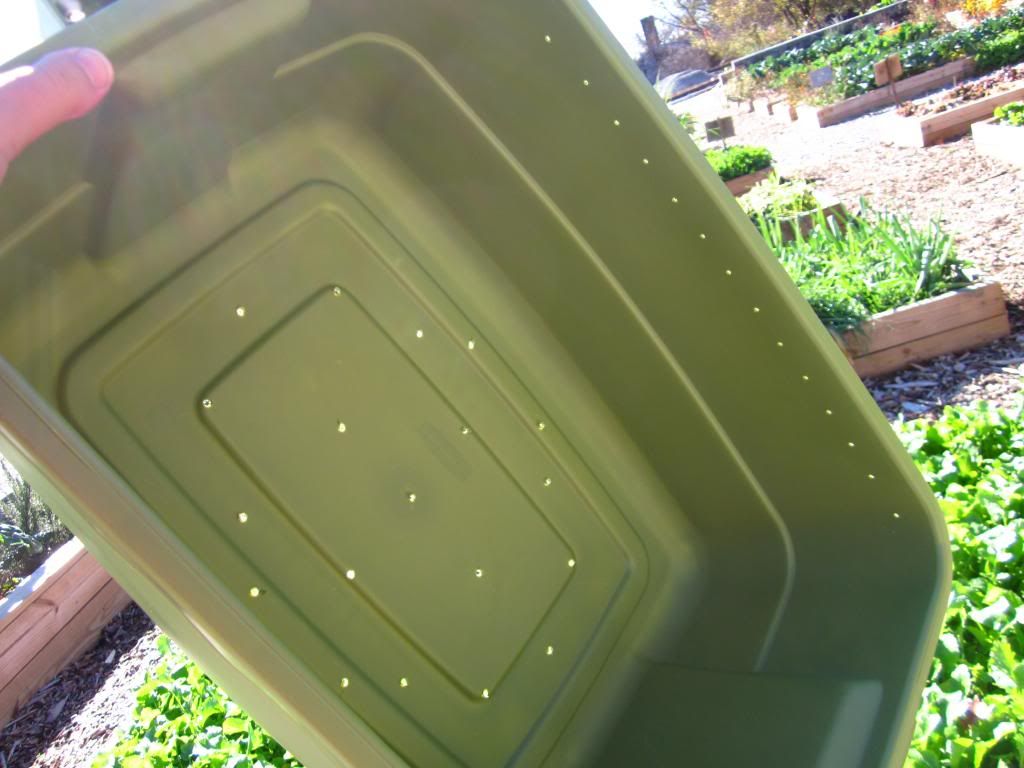 |
| Drill holes for drainage and ventilation |
Select one bin to begin with. Using the 1/4-inch drill bit, drill about 20 or so holes in the bottom of one bin. Be sure to space holes evenly along the bottom of the bin to ensure adequate drainage. A moist but well-drained bin is the key to prevent worms from drowning and to keep moist compost from becoming smelly from anaerobic bacteria.
With the 1/16-inch drill bit, drill ventilation holes along the top edge of the same bin. Try to space the holes about every inch or so. These small ventilation holes will provide air flow into the bin without allowing worms to escape from the sides.
Place the scrap wood inside the non-drilled bin close to the corners of the bin. Place the bin that has holes inside of the bin, lifted up by the pieces of scrap wood. This will allow the compost bin to drain excess water without making a big mess on the floor.
There's no real rhyme or reason to adding the remaining components. My preference is to repeat layers like a lasagna inside the bin until the contents are a few inches below the ventilation holes, like so:
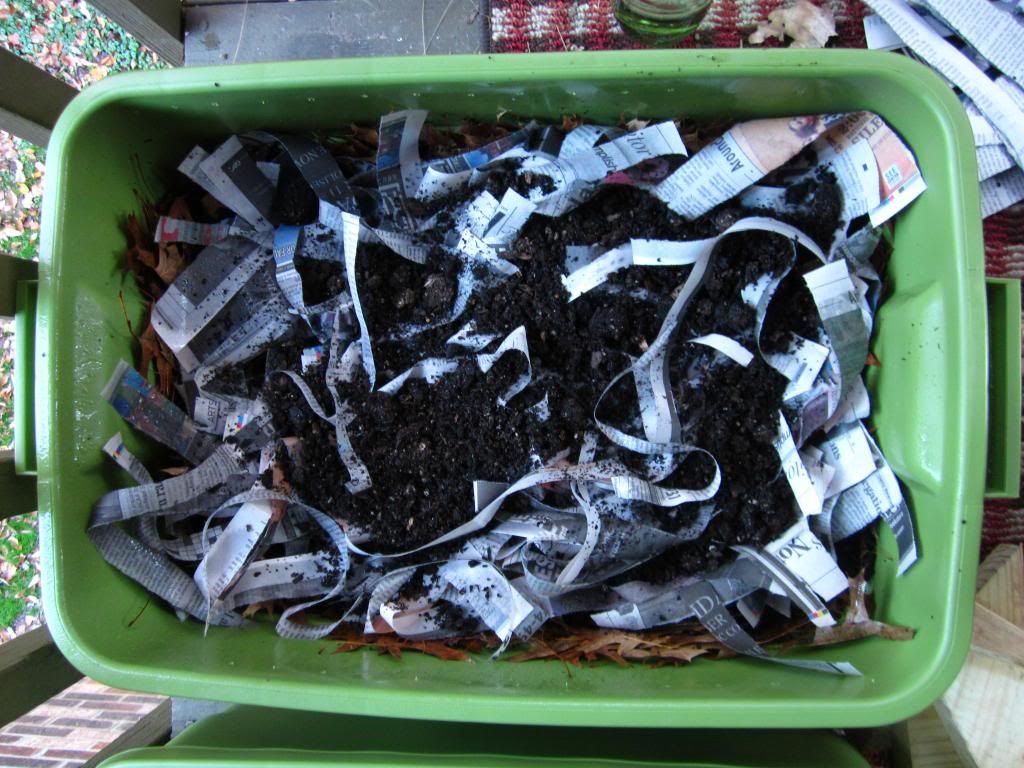 |
| I prefer to layer leaves, paper, and soil |
- Moist cardboard,
- Moist page of newspaper,
- Autumn leaves,
- Soil,
- Moist shredded paper,
- Soil,
- Worms,
- Moist cardboard,
- Moist page of newspaper
Secure the lid and you're ready to compost!
What to feed the worms
To feed your worms, lift the top layer of cardboard and newspaper. Bury the food to prevent fruit flies from finding it. Avoid over-feeding your worms to prevent fruit flies and other pests from becoming a problem. As with any compost situation, try to maintain 30 times more "brown" material (like paper and autumn leaves) than "green" material (food scraps).
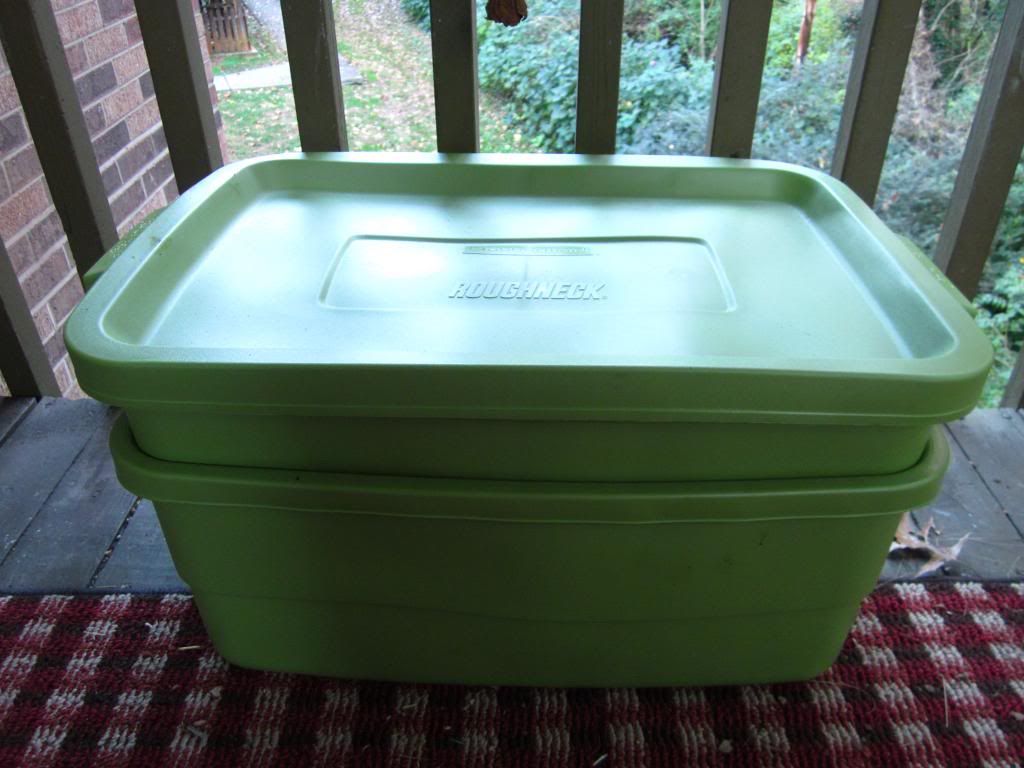 |
| My completed vermicompost bin |
Worms should only be fed plant-based scraps like apple cores, tea leaves, carrot tops, and dead leaves from houseplants. Worms should NOT be fed any salty food or animal products like meat, fat, or manure. Exercise common sense -- what would you want to eat if you were a worm?
Future expansions
Future expansions
When your worm population grows, you can add additional bins. Prepare the second bin with drainage and ventilation holes. Use the 1/4-inch drill bit to make holes in one lid. Stack the bins where the lid with worms is between them and the non-drilled lid is secured to the top bin. Worms will be able to travel through the holes between the bins. Add food to the top bin and the worms will create more vermicompost in the bottom bin. After the vermicompost is harvested from the bottom bin, switch the bins so that the freshly mixed bin is placed on top.
To see more photos of building a worm compost bin, check out my photobucket story.
If you have any questions, comments, ideas, or suggestions, I love to get email!
Sources of inspiration:
- Appelhof, Mary. Worms Eat My Garbage. <wormwoman.com/acatalog/Wormwoman_catalog_Worms_Eat_My_Garbage_3.html>.
- Stewart, Amy. The Earth Moved. <amystewart.com/books/the-earth-moved/>.
- "Teacher Fact Sheet: Worm Composting." SFEnvironment.org. <sfenvironmentkids.org/teacher/activities/Worm_Ed_Packet.pdf>.
- "Rubbermaid Worm Bin Plans." Vermicompost.net. <vermicompost.net/rubbermaid-worm-bin-plans/>.
- "Cheap and Easy Worm Bin." Washington State University Whatcom County Extension. <whatcom.wsu.edu/ag/compost/easywormbin.htm>.

No comments:
Post a Comment