There are so many different ways to grow a garden, from traditional furrow beds, to window boxes and everything in between. My absolute favorite way to grow annual veggies is in a raised bed planter.
What is a raised garden bed?
Raised bed gardening is easier on my knees and back because I don't need to bend over nearly as far to plant, weed, water, or harvest. There's also typically less weeding in a raised bed situation because it is difficult for creeping weeds to sneak into the garden from the sides.
There's more than one way to build a raised garden, and a variety of raised bed kits are available online or through local garden centers. However, kits can be expensive and some may even be more difficult to assemble than constructing your own. It can be difficult for home gardeners to choose a style or to decide whether to buy a kit or design and build themselves. For this reason, some people never make it past the planning stage stage.
If this is the year that you're finally going to build a raised garden, then I suggest starting with this very simple and inexpensive plan. All you really need is some lumber, posts, and soil to get started. Sounds easy, right?
To build a raised garden, you'll need:
Lay your lumber on the ground where you would like to build your raised bed. Step back and visualize what the garden will look like once it's constructed. Will your garden get enough sunlight? Most vegetable plants will need six or more hours of direct sunlight a day. How far away is the closest water source? Are you on a slope?
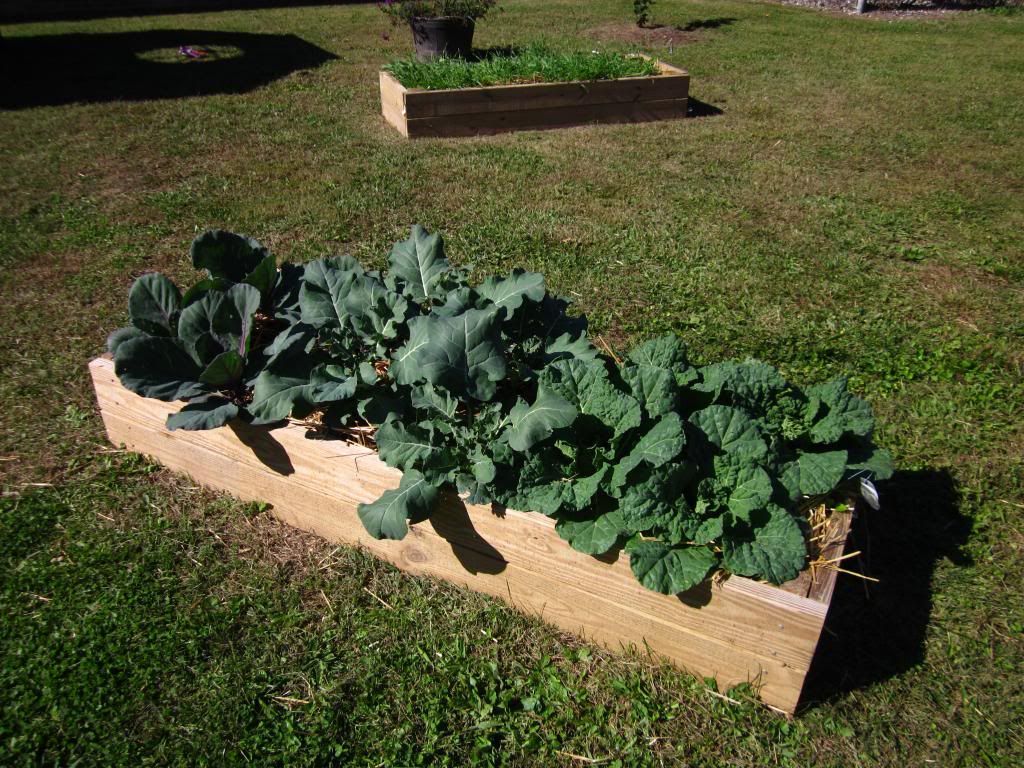 |
| A very manageable size raised vegetable bed at Austin-East High School |
Raised bed gardening is easier on my knees and back because I don't need to bend over nearly as far to plant, weed, water, or harvest. There's also typically less weeding in a raised bed situation because it is difficult for creeping weeds to sneak into the garden from the sides.
There's more than one way to build a raised garden, and a variety of raised bed kits are available online or through local garden centers. However, kits can be expensive and some may even be more difficult to assemble than constructing your own. It can be difficult for home gardeners to choose a style or to decide whether to buy a kit or design and build themselves. For this reason, some people never make it past the planning stage stage.
If this is the year that you're finally going to build a raised garden, then I suggest starting with this very simple and inexpensive plan. All you really need is some lumber, posts, and soil to get started. Sounds easy, right?
To build a raised garden, you'll need:
- Posts. I suggest:
- Four 4 inch x 4 inch x 2 foot posts.
- The posts will help secure the bed in the soil. It's really not necessary to go deeper than 1 foot into the ground. Even just 6 inches may be sufficient. Modify as you see fit.
- Sides. I suggest:
- Four 2 inch x 6 inch x 3 foot sections of lumber
- Four 2 inch x 6 inch x 5 foot sections of lumber
- I prefer rectangular beds to square beds because it's easier to reach the center of the bed. If you have to climb into your raised bed to work (as is the case for many square beds greater than 4 feet long), that kind of defeats the purpose.
- Feel free to modify the length, width, and height of your bed as you see fit. To change height of your bed, consider using 2x4s or 2x10s instead of 2x6s as I have.
- If you're not comfortable with cutting your own lumber, most box stores will cut your lumber order for you at a very minimal cost.
- Traditionally, pressure treated wood has been avoided because it would leach arsenic into the soil. Today, arsenic is no longer used to treat most lumber. Instead, pressure treated wood contains copper, which has some fungicidal properties for plants and should have a minimal affect on the garden. However, any sort of pressure treated wood is not recommended for organic gardening. For more information about using pressure treated wood in the garden, "Are Pressure Treated Woods Safe in Garden Beds?" is a helpful article.
- Soil
- 15 cubic feet of topsoil, or a volume appropriate to your bed. To find the amount of soil you'll need, multiply the width of the bed with the length and height of the bed (ex. 3 ft x 5 ft x 1 ft = 15 cubic feet).
- Less than 30 cubic feet of soil can be conveniently purchased in bags from your local garden center or box store. If a larger amount of topsoil is needed, consider ordering by the truck instead of bags.
- Tools
- 2.5 inch galvanized deck screws and power drill OR
- 3 inch galvanized nails and hammer
- I prefer screws to nails in a raised bed situation, but either method is acceptable.
- Flat edge shovel
- Post hole digger or a shovel
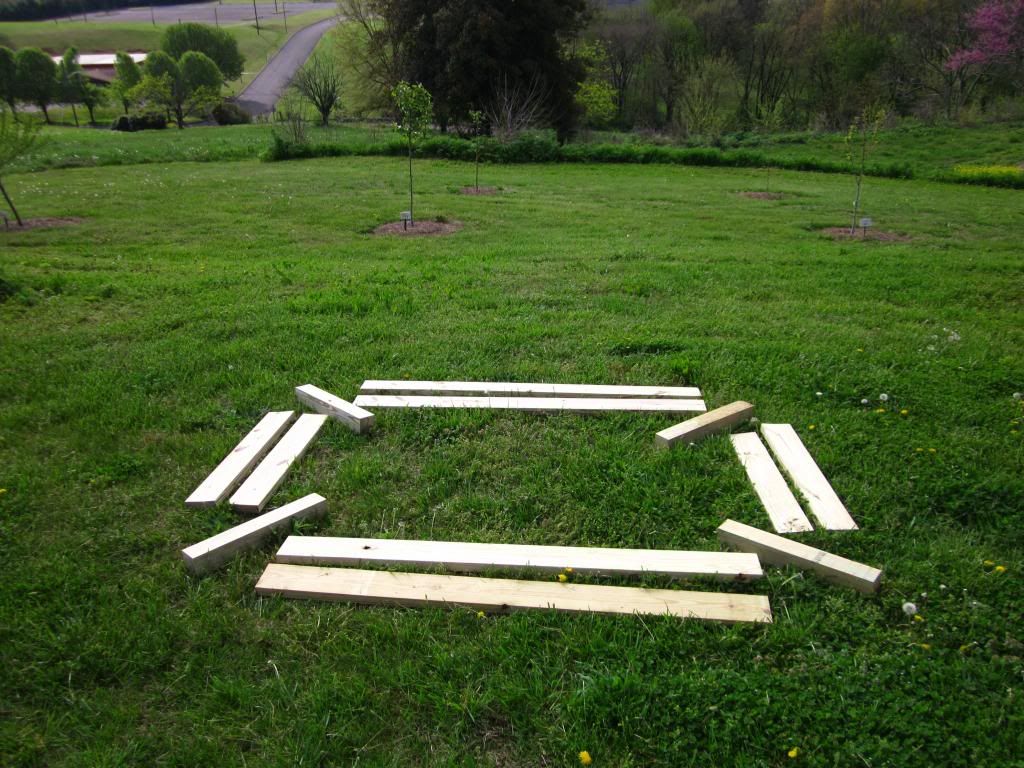 |
| Laying out lumber before building can help you picture what the garden bed will look like after construction |
Building your raised garden
 |
| I prefer only put one nail or screw in a board at first, so that I can move the lumber a bit if I need to make adjustments. |
When you have decided on a final location, mark the corners of where your bed will go. Before construction, the grass or other plants that are already on the site will need to be killed or removed. For smaller beds, it will be relatively easy to remove weeds with a flat edge shovel. You should be able to scrape up the plants (roots and all), leaving bare soil. Killing the weeds is an alternative to removing them mechanically. The weeds can be killed with horticultural vinegar, a broad spectrum herbicide, or even boiling water.
Once your bed is clean of existing plants, it's time to dig your post holes. If you don't have a post hole digger, a shovel will do.
Construction is pretty simple -- put the posts in the holes, and nail on the sides. This method can be a little bit sloppy; so I prefer putting the bed together in phases. First, build the ends of the bed. Nail or screw the two shorter boards to the posts for each side. It helps to just add one screw or nail at first, so the boards will be a little moveable. This way you have a little wiggle room if the bed needs to be adjusted a bit.
Place the end of the bed in the post holes. Are the ends straight? Are the holes deep enough? Make any necessary adjustments, then attach the sides of the bed. Go back and add the second screw or nail to each board so your garden bed will be more sturdy.
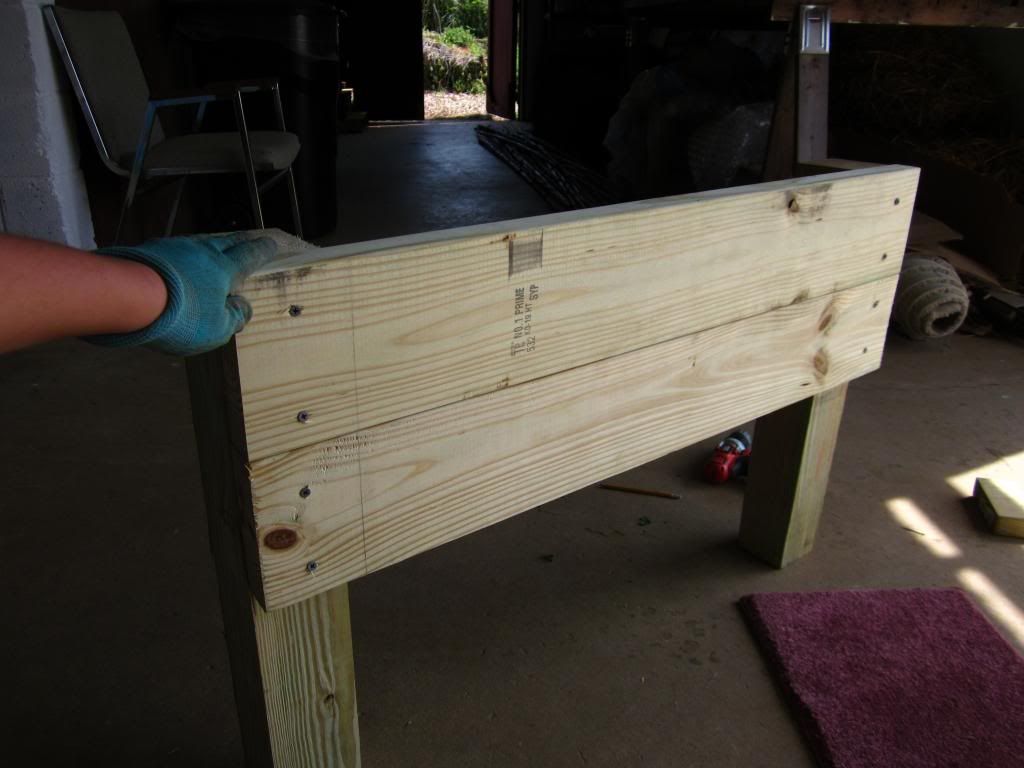 |
| I prefer to build the ends of the bed first |
Place the end of the bed in the post holes. Are the ends straight? Are the holes deep enough? Make any necessary adjustments, then attach the sides of the bed. Go back and add the second screw or nail to each board so your garden bed will be more sturdy.
Once the bed is built, fill soil back around the posts and press firmly. Add topsoil, plants, mulch and voila! You have successfully completed your raised bed garden!
To see more photos of building a raised bed garden, check out my photobucket story.
If you have any questions, comments, ideas, or suggestions, I love to get email!
What are your experiences with raised bed gardening? What is your favorite pre-fab kit? What is your favorite raised bed style?
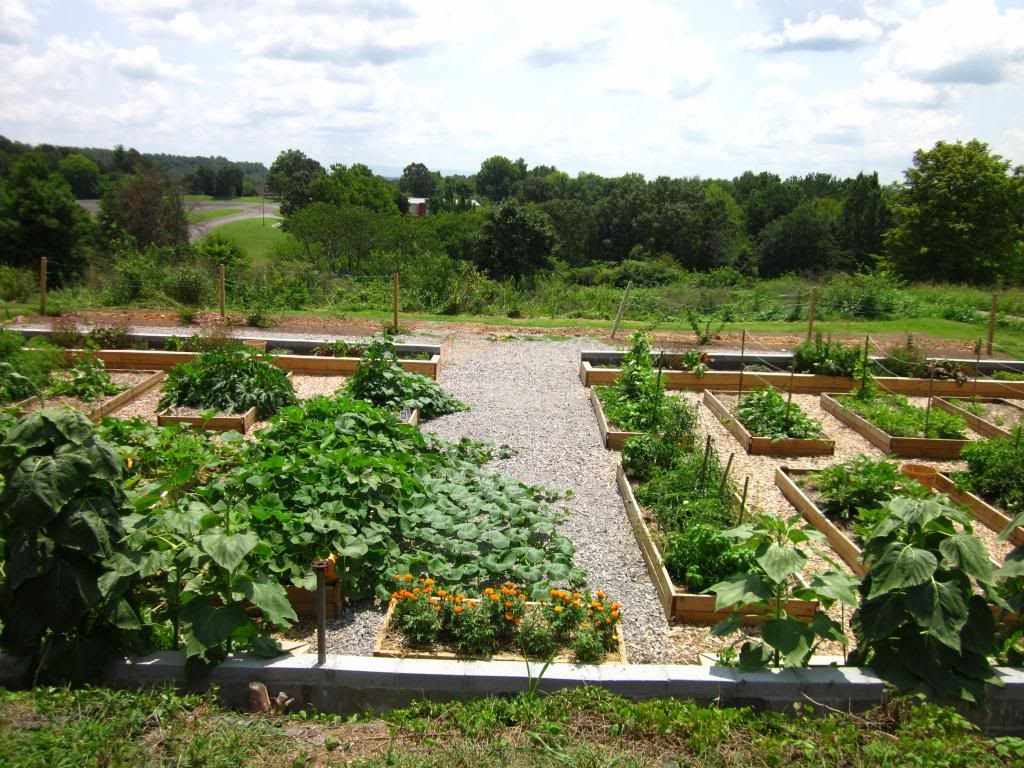 |
| We have 18 raised beds at the Knoxville Botanical Garden & Arboretum's "Every Child Outdoors" Youth Garden. |
This clip includes video of volunteers building raised garden beds beds at the Knoxville Botanical Garden & Arboretum's "Every Child Outdoors" Youth Vegetable Garden.
%20raised%20garden%20bed.)
Our town/city, Muskogee OK has built and is building several community gardens at schools, parks and community centers.
ReplyDeleteThey are all raised bed gardens - the smartest way to get good stuff happening quickly.
Our community is responding in a big way with all ages and neighborhoods becoming engaged in growing produce and new relationships.
Great post!
That's really cool Martha! Thanks for sharing.
DeleteGreat advice and information Amanda. I have a friend who is recovering from a back injury and she is thinking of changing to raised beds to avoid re-injuring her back.
ReplyDeleteThat's a good idea Rosemary. She may want to raise her bed up even further to avoid injury. We've had some success with a sort of a tabletop garden. I'd be happy to share the plans with you if you're interested? She may also enjoy vertical gardening. There are lots of good pre-fab systems. Or if she wants something DIY and she has some help with construction, she could build one from a pallet (http://gardenthrifty.blogspot.com/2012/12/favorite-pallet-planter.html).
DeleteSuper job of presenting the raised bed construction. Thank you Amanda!
ReplyDeleteThanks for reading Renata!
DeleteGreat tutorial here! I'd love to get into gardening more but I don't really have a lot of space at my home, I suppose I could try building one of these though, they look perfect for people who don't have a lot of space. Thanks!
ReplyDeleteYou're absolutely right Thomas -- a system like this is good for folks who have limited space. To get the most out of your raised bed garden, consider doing a "Gardening by the Foot" system. I don't follow this exactly because it gets a little crowded, but Mel Bartholomew's book is helpful for people who are just getting started (http://www.amazon.com/Square-Foot-Gardening-Second-Edition/dp/1591865484/ref=sr_1_1?ie=UTF8&qid=1372774011&sr=8-1&keywords=gardening+by+the+foot). Best of luck!
DeleteAdd topsoil, plants, mulch and voila! You have successfully completed your raised bed garden!Vertical garden planters
ReplyDeleteBlackjack: A Game-Changing Strategy for Blackjack - KTM Hub
ReplyDeleteBlackjack combines classic and classic game elements. 속초 출장안마 We have 이천 출장마사지 created a 용인 출장안마 casino where you can play the 남원 출장샵 game by yourself. We have 전주 출장샵 prepared a